
Table of Contents
How to Replace a Faulty Nissan Vent Control Valve
The vent control valve in a Nissan vehicle is a crucial component of the evaporative emissions system. This valve helps regulate the flow of fuel vapors from the fuel tank to the engine, preventing them from escaping into the atmosphere. Over time, the vent control valve can become faulty or clogged, leading to issues such as rough idling, decreased fuel efficiency, and even a check engine light. If you suspect that your Nissan’s vent control valve is malfunctioning, it is important to replace it as soon as possible to prevent further damage to your vehicle.
Before you begin the replacement process, it is essential to gather all the necessary tools and materials. You will need a new vent control valve specific to your Nissan model, a Socket Wrench set, a pair of pliers, and a jack and jack stands if necessary. It is also a good idea to have a repair manual for your vehicle on hand to guide you through the process.
To start, locate the vent control valve on your Nissan. The valve is typically located near the fuel tank or the Charcoal canister, which is part of the evaporative emissions system. Once you have located the valve, disconnect the electrical connector and vacuum hoses attached to it. Use a socket wrench to remove the mounting Bolts holding the valve in place. Carefully remove the old vent control valve from its mounting location.
| Model: Manual Filter\u00a0Valve | MF2 \u00a0 \u00a0 \u00a0 \u00a0 \u00a0 | MF2-H | MF4 \u00a0 \u00a0 \u00a0 \u00a0 \u00a0 \u00a0 | MF4-B | MF10\u00a0 \u00a0 \u00a0 \u00a0\u00a0 |
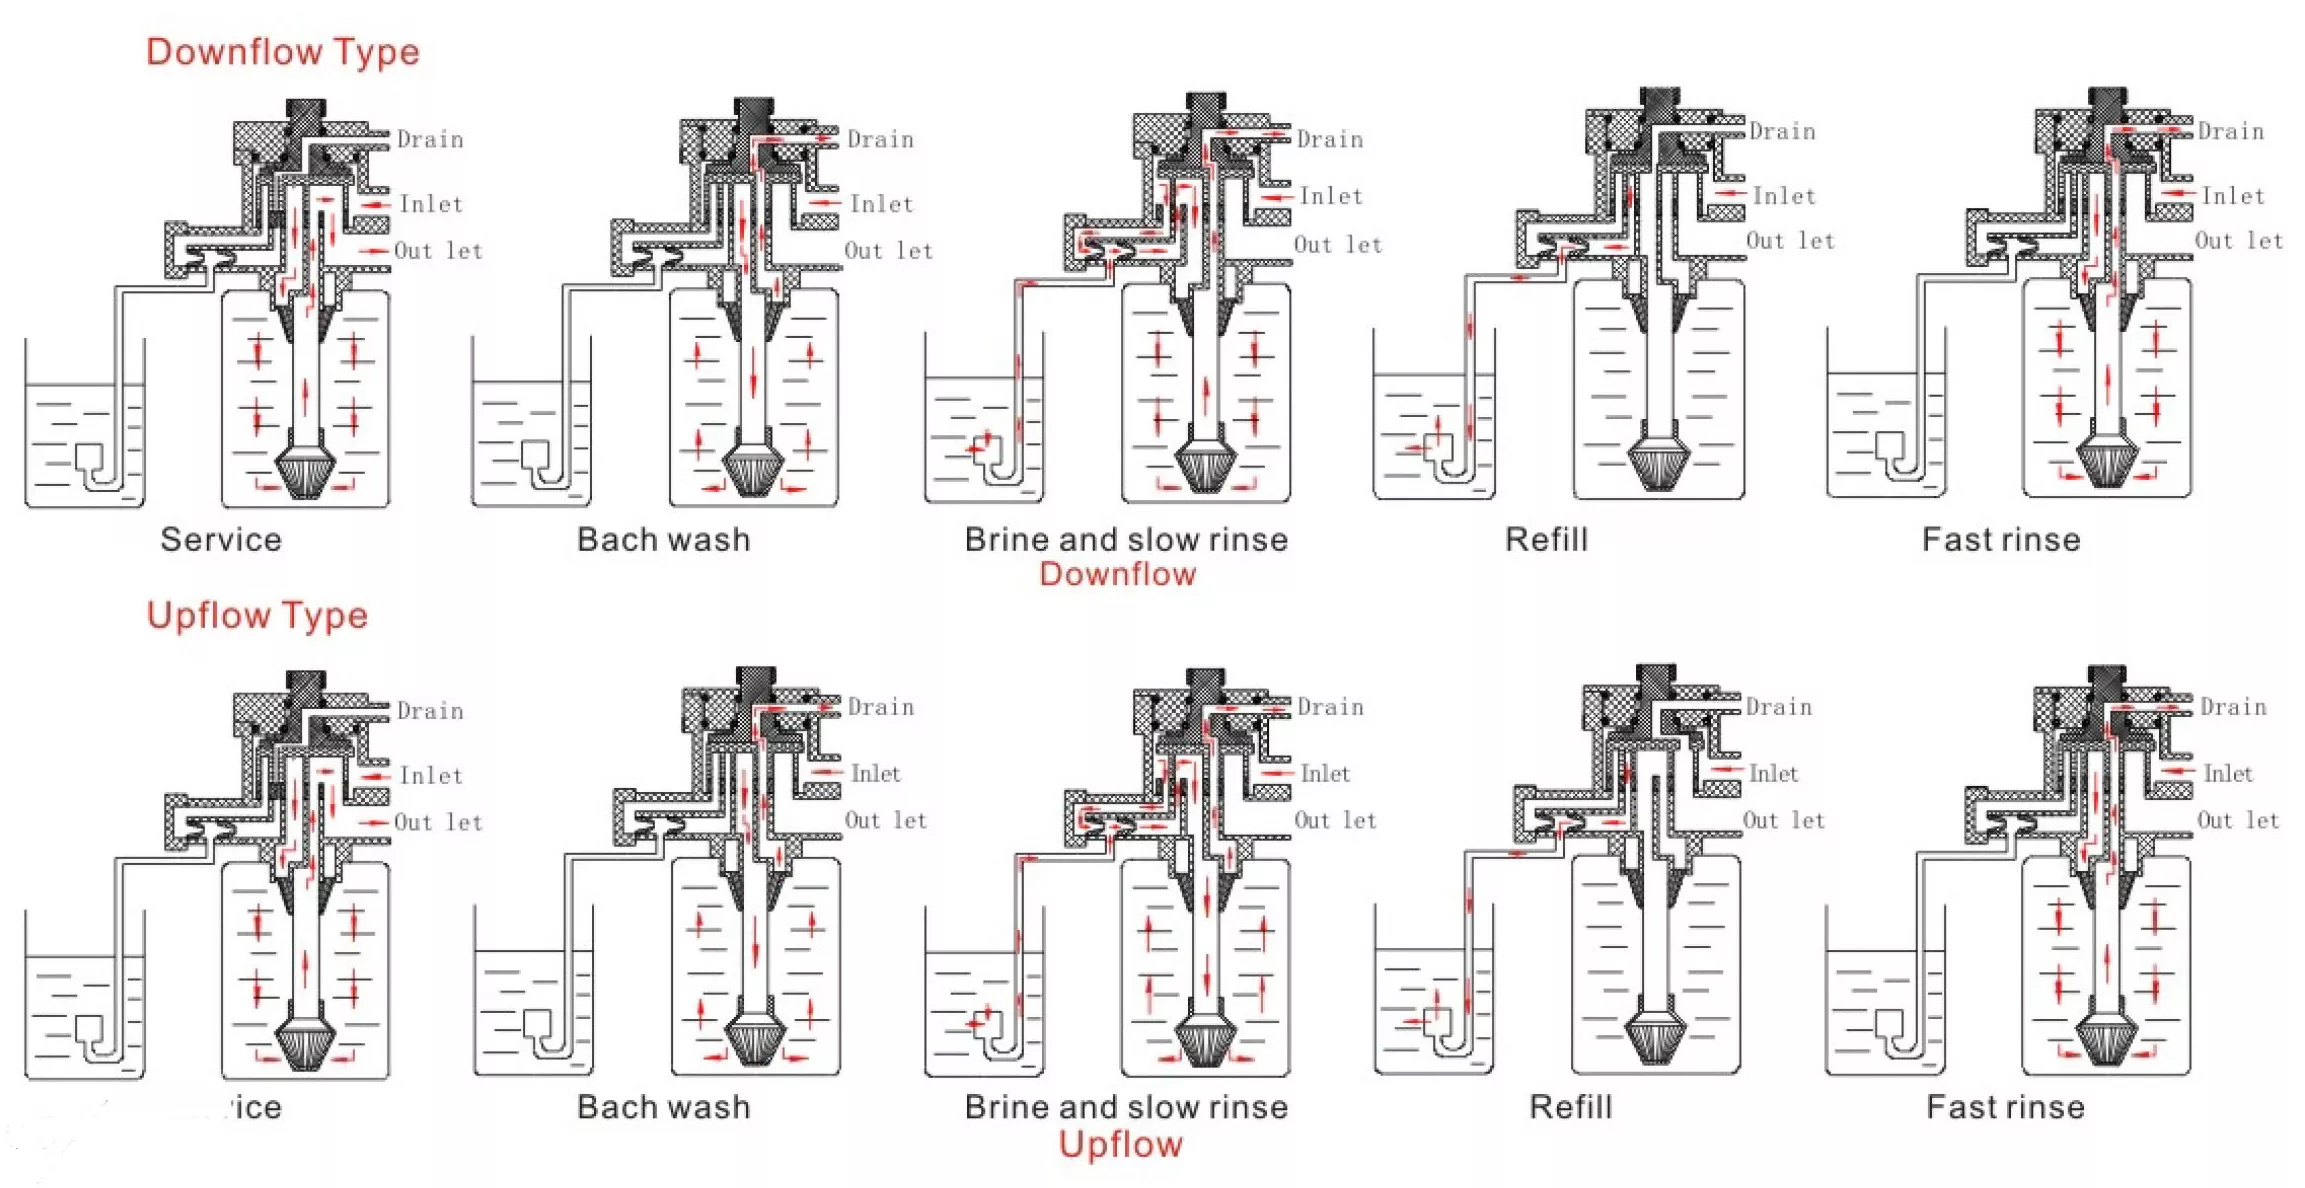
| Working Position | Filter -> Back wash -> Fast rinse ->Filter | ||||
| Regeneration mode | Manual | ||||
| Inlet | 3/4” | 3/4” | 1” | 1” | 2” |
| Outlet | 3/4” | 3/4” | 1” | 1” | 2” |
| Drain | 3/4” | 3/4” | 1” | 1” | 2” |
| Base | 2-1/2” | 2-1/2” | 2-1/2” | 2-1/2” | 4” |
| Riser pipe | 1.05” OD | 1.05” OD | 1.05” OD | 1.05” OD | 1.5”D-GB |
| Water Capacity | 2m3/h | 2m3/h | 4m3/h | 4m3/h | 10m3/h |
| Working Pressure | 0.15-0.6Mpa | ||||
| Working Temperature | 5-50 \u00b0C | ||||
| Power Supply | No need Power | ||||
Before installing the new vent control valve, it is important to inspect the mounting area for any signs of damage or debris. Clean the area thoroughly to ensure a secure fit for the new valve. Once the mounting area is clean, position the new vent control valve in place and secure it with the mounting bolts. Reattach the electrical connector and vacuum hoses to the new valve, making sure they are properly connected.
After installing the new vent control valve, it is important to test the system to ensure proper functionality. Start your Nissan and listen for any unusual noises coming from the vent control valve. You can also use a diagnostic tool to check for any error codes related to the evaporative emissions system. If everything appears to be in working order, you can rest assured that your Nissan’s vent control valve has been successfully replaced.